|
|
 |
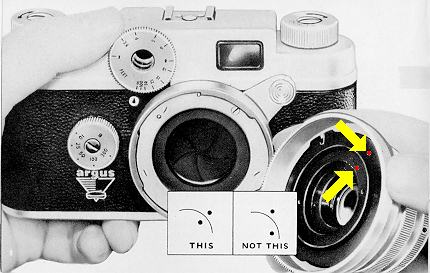
Your Cintar Lens does not have a visible focusing scale, therefore you cannot set your lens at the infinity (oo) position
as described for the Telephoto or Wide Angle lens. Before installing your Cintar Lens you will have to refer to the rear of
your lens. You will see two white dots (shown as red in photo for clarity). One of these dots is located on a movable ring,
whereas the other dot is on a stationary ring. Your lens is focused at the infinity (oo) position when the two white dots
are lined up opposite each other. If the white dots are not in line you may turn the movable ring in either direction until
they are correctly aligned.
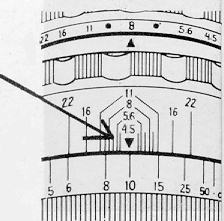
Hold lens with depth of field scale facing you and locate red arrow facing distance scale.
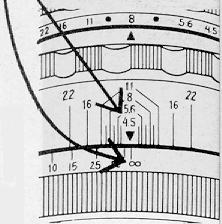
Turn rear collar of lens until infinity (oo) position lines up with red arrow. At infinity (oo) you will feel and hear
a click that will hold lens from slipping out of position.
Holding camera as described, make sure that the infinity
(oo) position of the rangefinder wheel is aligned with index mark of camera and firmly hold thumb on rangefinder wheel.
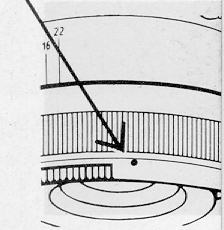
Take your lens and locate red dot on side of rear lens collar. Align the red dot with the camera's rangefinder index
mark. Place lens on mount, MAKING SURE THAT TEETH OF LENS COUPLING GEAR ARE PROPERLY ENGAGING TEETH OF CAMERA'S RANGEFINDER
WHEEL. Then gently press lens against camera.
CAUTION: IF TEETH OF GEARS DO NOT ENGAGE, LIFT LENS SLIGHTLY FROM CAMERA
MOUNT, KEEPING TEETH OF RANGEFINDER WHEEL AND COUPLING GEAR IN VIEW; then turn rangefinder wheel in either direction approximately
one gear's tooth. As soon as gear teeth engage gently press lens against camera.
Pull down bayonet arm to bayonet arm
stud, thereby securing lens in position.
|
|
|
|
|
|
|
|